
How to Sew Seams Like a Pro (And Why Every Homesteader Needs a Tailor’s Clapper)
Out here on the homestead, nothing goes to waste—not fabric scraps, not fence posts, not even a block of wood. And when it comes to sewing, the right seam makes the difference between “it’ll do” and “this will last.” Let’s walk through the most useful seam types, then I’ll show you the little block of hardwood that makes them look sharp: the tailor’s clapper.
The Most Useful Seams - and a free download!
Simple Seam
Two pieces of fabric, stitched together. Quick and easy, but the raw edges need finishing. Best for everyday projects.

illustration by Suzi Wollman using TrueWoven Fans & Feathers
French Seam
Edges tucked neatly inside—perfect for sheer fabrics or anything you want looking tidy inside and out.

Illustration by Suzi Wollman using TrueWoven Garden Rise
Flat-Fell Seam
Strong as a barn beam. This is the one you’ll find in jeans. Great for work clothes and items that get a lot of wear.

Illustration by Suzi Wollman
Lapped Seam
One fabric overlaps the other, stitched down. Common in leatherwork or heavy-duty sewing.
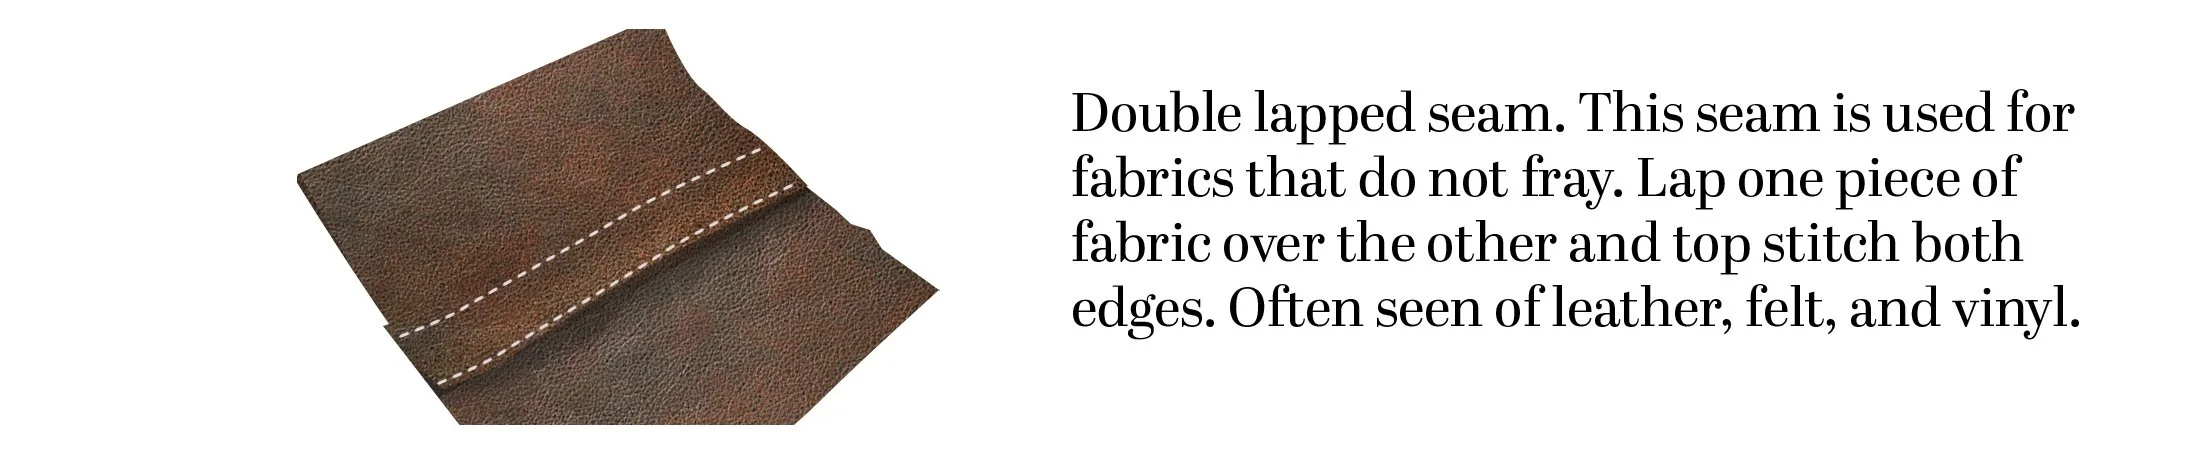
Illustration by Suzi Wollman
Welt Seam
A welt seam is like the sturdier cousin of the plain seam. After stitching the two fabric layers together, you press the seam to one side and then stitch it down again from the top. This double stitching locks everything in place and adds strength, a lot like driving in an

Illustration by Suzi Wollman using TrueWoven Modern Organic Ashleaf Study
These next two are the most common seam finishes, not seams in an of themselves.
Bound Seam
Edges covered in bias tape. Pretty as well as practical—great for unlined jackets or handmade bags.
Overlocked/Serger Seam
The time-saver: trims, sews, and finishes in one pass. Ideal for knits or when you’re short on time.
Why Pressing Is Half the Battle
A good press makes every seam behave. Steam sets the stitches; pressure trains the fabric to lie flat. Which is where the tailor’s clapper comes in.
What’s a Tailor’s Clapper?
It’s the homestead version of high-end sewing tools: simple, sturdy, and made to last.
Your iron gives you heat, but a tailor’s clapper traps and presses that heat and steam longer. That’s the difference.
When you lift the iron, the fabric wants to spring back a little as it cools. If you immediately press the clapper onto the seam, it holds the fibers flat while they set in place. You get a crisper edge, flatter seam, and a finish that lasts through washing.
It’s most helpful on:
Thick fabrics that resist flattening (denim, wool, canvas).
Places where bulk is a problem (collars, hems, facings).
When you want razor-sharp pleats or creases.
You can skip it on light cotton where a quick press does the trick — but once you use one on a tricky seam, you’ll probably keep it within reach.
Make Your Own Clapper
You can buy one for about $10 or $20, but why not make one?

Start with hardwood (maple, oak, ash).
Cut to about 2" thick, 3–4" wide, and 8–10" long.
Round the edges so it’s comfortable in your hand.
Sand smooth. Leave the wood unfinished—raw wood absorbs steam best.
That’s it. You’ve got a seam-setting tool that’ll outlast a dozen irons.