

I am fighting years and years of filling my body with toxins, for which I am paying a hefty price in terms of my health. Over the last decade or so, I’ve developed so many issues that when I met my friend Pat, a very talented and caring Naturopath, I thought surely heaven had touched earth.
I’m now on my second month on the GAPS diet, and I’m noticing the many ways that I have unknowingly tolerated a toxic life for decades. My body is detoxing (still), healing, and rebuilding the systems that would have kept me healthy all along if only I had known.
This week, I decided to tackle the things in my home that are hidden toxins and thought while I’m doing that, I’ll let you in on what I’ve learned on this journey.
Toxins in the Home, Part 1: The Hidden Hazards in Everyday Products
So What Are Household Toxins?
I used to think if a product was sold in stores with terms like “natural,” it must be safe. But the more I’ve learned, the more I see that many common ingredients—even in things labeled “gentle,” “green,” or “natural”—can contribute to hormone imbalance, inflammation, and long-term health issues. These are ingredients that may not make you sick right away, but they burden your body over time.
I’m talking about things like:
Phthalates
Parabens
PEGs
“Fragrance” (a catch-all term hiding hundreds of chemicals)
Quats (quaternary ammonium compounds)
Formaldehyde-releasing preservatives
Microplastics like PVA
My Wake-Up Call: Reading the Labels
Label #1: My Hand Cream
I grabbed a tube from my purse and read: PEG-2 Stearate, Triethanolamine, Parabens, Fragrance.
I had no idea that PEG compounds can be contaminated with 1,4-dioxane, a probable carcinogen. Or that parabens mimic estrogen and have been found in breast tumors. Or that “fragrance” can legally include phthalates, which mess with hormones.
And yet, I was rubbing this on my hands (and therefore eating it, basically) every day.
What I’m choosing now: Simple, nourishing balms made with shea butter, coconut oil, and essential oils. No mystery ingredients. No hormone disruptors.
The Air Freshener Dilemma
I used to love walking into a room that smelled like “spring rain” or “lavender fields.” But those scents? They were 100% synthetic.
My spray can label read: Alcohol Denat., PEG-60, Fragrance, Benzisothiazolinone.
Even worse, it was in aerosol form—so all those tiny chemical particles were being sent straight into my lungs.
Now, I open windows. I simmer herbs or citrus peels. I use essential oil diffusers (and only the pure oils). I ditched the spray can, and honestly? My house smells cleaner because it is cleaner.
Cleaners: When “Fresh” Means Toxic
This one hit hard. I’ve used so many scented surface sprays over the years. But I never thought to ask: “What’s actually in this?”
Turns out, things like:
Quats (respiratory irritants)
Artificial fragrance
Preservatives that slowly release formaldehyde
Even the word “antibacterial” now makes me pause. Many of those products included triclosan, which the FDA now discourages in hand soap due to health risks.
Now, I clean with castile soap, vinegar, and baking soda. I use brands that actually list every ingredient and have third-party safety certifications. And yes—my counters are just as clean.
What I've Learned
Labels aren’t always honest. “Natural” doesn’t mean non-toxic. And sometimes the most dangerous ingredients are hidden in small print—or not listed at all.
That’s why I’ve created a [Visual Label Decoder] to help me (and now you) break it all down quickly. It’s on my fridge and goes with me to the store.
Detoxing the Kitchen & Laundry Room
When I wrote the first part, I thought I’d just dip my toe into the world of detoxing my home. But as I opened cabinets, read labels, and followed the trail from one product to another, I realized this wasn’t just about getting rid of a few bad ingredients—it was about reclaiming the safety of the space I live in every day.
So I moved into the kitchen and laundry room, two places where health and harm often share a shelf. And once again, I was surprised by what I found.
🍽️ Kitchen: Clean Food, Toxic Containers?
I’ve spent years trying to eat clean—organic when I can, unprocessed as much as possible. But I never thought to question what I stored that food in or what I was eating off of.
Until I looked closely.
Food Storage
I used to reheat leftovers in plastic. I stored soup in stained takeout tubs. I had plastic wrap over everything in the fridge. Turns out, BPA is just one of many chemicals that can leach from plastic into food—especially with heat or acidic foods.
What I replaced:
• Tossed all the stained, warped plastic containers
• Replaced with mason jars, stainless steel tins, and glass containers with silicone lids
• Switched to beeswax wrap instead of plastic wrap
Dinnerware
I didn’t expect this one to hurt quite so much. I had a stack of pretty, colorful plates I’d picked up over the years—some even sentimental. But then I started researching what’s really in ceramic glazes.
What I learned shocked me:
• Lead and cadmium, both toxic heavy metals, are still used in glazes—especially in dishware imported from countries like China, where regulations are loose or nonexistent.
• These metals can leach into hot, acidic, or even just moist food, especially if the glaze is cracked or worn.
So I tested my dishes with lead swabs and tossed the ones that failed—or that I couldn’t verify as safe.
What I use now:
• Plain white stoneware from brands with verifiable safety records
• Glass dishes when I can
• I keep vintage or decorative plates off the dinner table and on the shelf
It’s not just about what’s on your plate. It’s about what’s in it, too.
Nonstick Cookware
Years ago, Teflon was in my cupboard. I didn’t realize the coating could release toxic fumes when overheated, and that PFOAs—used in older nonstick coatings—were linked to cancer, hormone disruption, and organ damage.
And even “safe” nonstick coatings can degrade when overheated or scratched.
What I use now:
• Cast iron, seasoned well and naturally nonstick
• Stainless steel for searing and daily cooking
• Enameled steel cookware, which we love—it’s non-toxic, non-reactive, and beautiful in the kitchen. It gives us the ease of nonstick without the chemical risk.
What I learned: Even safe pans need gentle care. I no longer preheat pans empty on high, and I don’t use metal utensils or abrasive scrubbers. Overheating any cookware—yes, even ceramic or enamel—can degrade coatings, release fumes, or shorten its life. So we heat slowly, cook mindfully, and let the cookware do its job without pushing it too hard.
Water
I drank filtered water. But my under-sink filter didn’t remove fluoride, pharmaceuticals, or heavy metals.
What I upgraded to:
• A gravity-fed Berkey with fluoride filters
• Sometimes I add minerals back with a pinch of Himalayan salt or trace mineral drops
It’s not about fear—it’s about clarity. Every little shift lightened my body’s burden.
🧺 Laundry Room: Clean Clothes, Hidden Chemicals
This one stung a little, because clean laundry is such a comforting thing. But I had no idea how many endocrine disruptors, respiratory irritants, and persistent environmental toxins were in my detergent and dryer sheets.
Laundry Detergent
That “fresh” scent? It was synthetic fragrance, made of dozens—sometimes hundreds—of chemicals, none of which had to be disclosed. Some were linked to asthma, reproductive harm, and even long-term cancer risk.
Even the “unscented” version still had masking chemicals.
What I use now:
• A homemade laundry powder: washing soda, borax (optional), grated Castile soap, and baking soda
• Sometimes Truly Free or Molly’s Suds for convenience
• White vinegar in the rinse compartment as fabric softener
Dryer Sheets
These were the worst offenders. Coated in chemicals designed to cling to clothes, dryer sheets create that artificial softness and scent—but at the cost of skin irritation and indoor air pollution.
What I use now:
• Wool dryer balls—I’ll add a drop or two of essential oil if I want scent (but usually don’t)
• A line outside when I can
• A lower heat setting to avoid static cling naturally
Stain Removers & Bleach
Spot-treating with chlorine bleach or “oxy” cleaners used to be my go-to. But bleach fumes are irritating, and many commercial stain sprays include solvents that affect liver function over time.
What I use now:
• A simple paste of baking soda + hydrogen peroxide for stains
• Sunlight, which naturally bleaches and sanitizes whites
• A concentrated Castile soap + vinegar spray for sweaty or musty fabrics
💡 What Surprised Me Most
I didn’t expect to love doing laundry more. But I do now. The scent isn’t overwhelming, the process feels simple, and there’s this quiet satisfaction in knowing my clothes are clean without being coated in chemicals.
The kitchen? That felt like a major upgrade—not just to my health, but to how I feel cooking meals. Fewer worries. Better tools. More trust.
📝 What You Can Do Today
You don’t have to overhaul everything at once. But here are a few easy wins to get started:
• Switch your food storage containers to glass, one at a time
• Ditch dryer sheets (seriously, just try it!)
• Add white vinegar to your laundry rinse cycle
• Try making one cleaner yourself—like my dishwasher powder or dusting spray
• Use baking soda in a jar in the fridge, under the sink, or even in your shoes
• Check your dinnerware and test older or imported pieces for lead and cadmium
Each step builds momentum. Each change clears a little more space—physically, emotionally, and biologically—for healing.
Now let’s walk through what’s commonly in conventional floor cleaners, what to avoid, and what non-toxic alternatives (because I want to be able to walk barefoot in my own home!) you can use instead—including homemade options.
🚫 What’s in Conventional Floor Cleaners (and Why It Matters)
Whether it’s a squirt-and-mop product or something you dilute in a bucket, most conventional floor cleaners contain:
• Fragrance (undisclosed) – loaded with phthalates and other endocrine disruptors
• Solvents like butoxyethanol or isopropanol – respiratory and skin irritants
• Surfactants that aren’t biodegradable and may leave film
• Preservatives like methylisothiazolinone – linked to allergies and neurotoxicity
• Optical brighteners – unnecessary chemicals that can cause skin sensitivity
Even “eco” brands often sneak in fragrance or PEGs. And on hard floors, these substances don’t evaporate quickly—they sit on the surface, right where your feet touch.
✅ Barefoot-Safe Natural Floor Cleaner Recipes
🧼 For Sealed Wood, Laminate, Tile, or Linoleum
General Mop Solution (Bucket or Spray Mop):
• 1 gallon hot water
• 1/4 cup white vinegar
• 1 tbsp Castile soap (unscented or lavender/lemon)
• Optional: 5–10 drops essential oil (eucalyptus, tea tree, lemon, or rosemary for antimicrobial boost)
To Use:
• Mop as usual. No rinsing needed.
• Leaves no film, dries quickly, and is safe for pets and bare feet.
💡 Note: Vinegar is not ideal for unsealed wood floors or natural stone (like granite or marble). For those, skip the vinegar and try the following:
🌿 For Unsealed Wood or Natural Stone
Gentle Cleaner (pH Neutral):
• 1 gallon warm water
• 1 tsp Castile soap
• Optional: 1 tsp olive oil (for conditioning sealed wood)
• Optional: 3–5 drops essential oil for scent
Use a barely damp mop (like a microfiber pad), wring well, and mop with the grain. Dry any puddles immediately.
🌱 All-in-One Spray Cleaner (Great for Spot Mops or Quick Wipe-Ups)
• 1 cup water
• 1 cup white vinegar
• 1 tsp Castile soap
• 10 drops lemon or orange essential oil
Shake before use and lightly mist floors before mopping or wiping. This is great for small spaces or quick cleanups between deeper cleans.
🧾 Cost & Safety Comparison
Feature Homemade Floor Cleaner Swiffer / Pine-Sol / Bona
Non-toxic / barefoot safe ✅ Yes ❌ No (fragrance, solvents)
EWG Score (Ingredients) A–B C–F
Safe for babies/kids/pets ✅ Yes ⚠️ No – residue risk
Leaves behind residue ❌ No – evaporates cleanly ✅ Yes – often sticky or slick
Cost per gallon ~$0.50–$1.00 ~$4.00–$8.00
Scent Customizable, essential oils Synthetic, strong
Packaging waste None (reuse your bottle!) High (disposable pads, bottles)
👣 Why It Matters for Barefoot Living
• Your skin absorbs more than you think—especially the soles of your feet, which have large pores and lots of capillaries close to the surface.
• Kids and pets are often even more vulnerable to floor residues because they crawl, sit, and lick things off the floor (sometimes everything off the floor).
• A simple, vinegar-and-soap mop solution leaves your floors feeling clean without that “coated” sensation or hidden chemical film.
Clearing the Craft Room
I’ve spent years creating things—stitching, painting, sculpting, dreaming things into life with my hands. My craft room has always been a refuge, a little space where the rest of the world melts away and imagination takes center stage. But on this journey toward healing, I started to wonder: what else was I bringing into that space besides creativity?
I had already detoxed my hand cream, my dish soap, even my dinnerware. But my paints? My glues? The polymer clay I used with my grandkids? I’d never given them a second thought.
So I did what I’ve been doing with every room in my home: I got curious, I read labels, and I started making safer choices—one material at a time.
🎨 The Hidden Toxins in Common Craft Supplies
It turns out the materials we use to create beautiful things can be less-than-beautiful when it comes to our health. Here are some of the worst offenders I found in my craft stash:
Paints & Sealants
Acrylics, even the inexpensive craft kinds, often contain:
• Preservatives like isothiazolinones, which are linked to skin and lung irritation
• VOCs (volatile organic compounds) from solvents that off-gas for days
• Heavy metals like cadmium, lead, or chromium in certain pigments—especially reds, oranges, and yellows
What I use now:
• Water-based artist paints from companies that disclose ingredients
• Plant- and mineral-based pigments for kid-friendly projects
• Fresh air and gloves every time I paint
Glues & Adhesives
From super glue to rubber cement, many adhesives contain:
• Toluene, xylene, and other petroleum-based solvents
• Cyanoacrylate, which vaporizes into a lung irritant when used indoors
• Labels that say “instant bond” but don’t say what’s inside
What I use now:
• School glue or wheat paste for paper crafts
• Plant-based wood glue when I need strength
• If I must use super glue, I open a window and wear gloves—every time
Clay, Joint Compound & Sculpting Mediums
Polymer clay (like Sculpey or Fimo) releases phthalates and vinyl chloride when baked.
Joint compound, often used in home-decor DIYs, contains crystalline silica, which becomes airborne when sanded and is dangerous to inhale.
What I use now:
• Homemade air-dry clay with flour, baking soda, and cornstarch
• Natural modeling clays with kaolin or bentonite
• Always sand outside and wear a dust mask or respirator
Inks, Markers & Sprays
My permanent markers, inks, and spray paints were full of:
• Alcohols and solvents (often neurotoxic in closed spaces)
• Benzene and glycol ethers, especially in spray cans
• Synthetic dyes that leave a chemical residue on skin and tools
What I use now:
• Water-based markers and soy-based block printing inks
• Outdoor-only spray painting (or none at all)
• Keep windows open when using any ink, even the ones labeled “non-toxic”
💨 What We Breathe While We Craft Matters
Craft rooms tend to be small, closed-in spaces, and most of us don’t think twice about lighting a candle and getting creative for a few hours. But when I thought about how often I worked in there barefoot, breathing deeply, touching my face, and sharing the space with my grandchildren—I realized I needed to make it safer.
Because creativity should inspire life—not burden your liver, your lungs, or your endocrine system.
✅ My Craft Room Detox Checklist (and a Free Download)
Here’s what I’ve changed so far:
• Replaced mystery glues with plant-based or school glue
• Swapped out synthetic air fresheners and candles for beeswax and essential oil diffusers
• Moved solvent-based products into sealed, labeled bins on the porch
• Only use polymer clay in a dedicated toaster oven in a ventilated space—never in the kitchen
• Use cotton aprons, gloves, and old jars to store supplies safely
• Mop and dust regularly to prevent toxic particles from building up on floors and shelves
Now my craft room smells cleaner, feels better, and I no longer wonder what I’m absorbing through my skin or lungs while I create.
✂️ Creativity Without Compromise
This process has made me more intentional. Not fearful—just aware. I still make art, sew gifts, play with clay, and paint signs for the homestead. I just do it knowing that the things I use are in service to life, not quietly working against it.
We were made to create. Let’s do it in a space that honors the bodies we live in.
Next up? I’m thinking about tackling seasonal storage, holiday supplies, and even what’s hiding in our candle collections. If there’s a space you’re wondering about, let me know. We’ll clean it up—together.
🌿 Houseplants in the Detoxifying Scheme
Why Houseplants Matter in Detoxing Your Home
Most people think houseplants are just for décor—but they’re actually natural air filters, and many absorb harmful airborne chemicals that come from:
• Paint, glues, and craft supplies (like VOCs and formaldehyde)
• New furniture, flooring, and cabinetry (off-gassing)
• Cleaning supplies, aerosols, even candles
• Plastics and synthetic fabrics
• Gas stoves and fireplaces
Certain plants can actually pull toxins out of the air and metabolize them—essentially “cleaning” your air 24/7 in a way filters can’t.
Back in the 1980s, a NASA Clean Air Study found that specific houseplants could significantly reduce:
• Formaldehyde
• Benzene
• Trichloroethylene
• Xylene
• Toluene
• Carbon monoxide
• Even mold spores and airborne bacteria
🪴 Top Easy-Care Air-Purifying Houseplants
Here are your best allies for detoxing the air—pothos included—with a focus on low maintenance and high effectiveness.
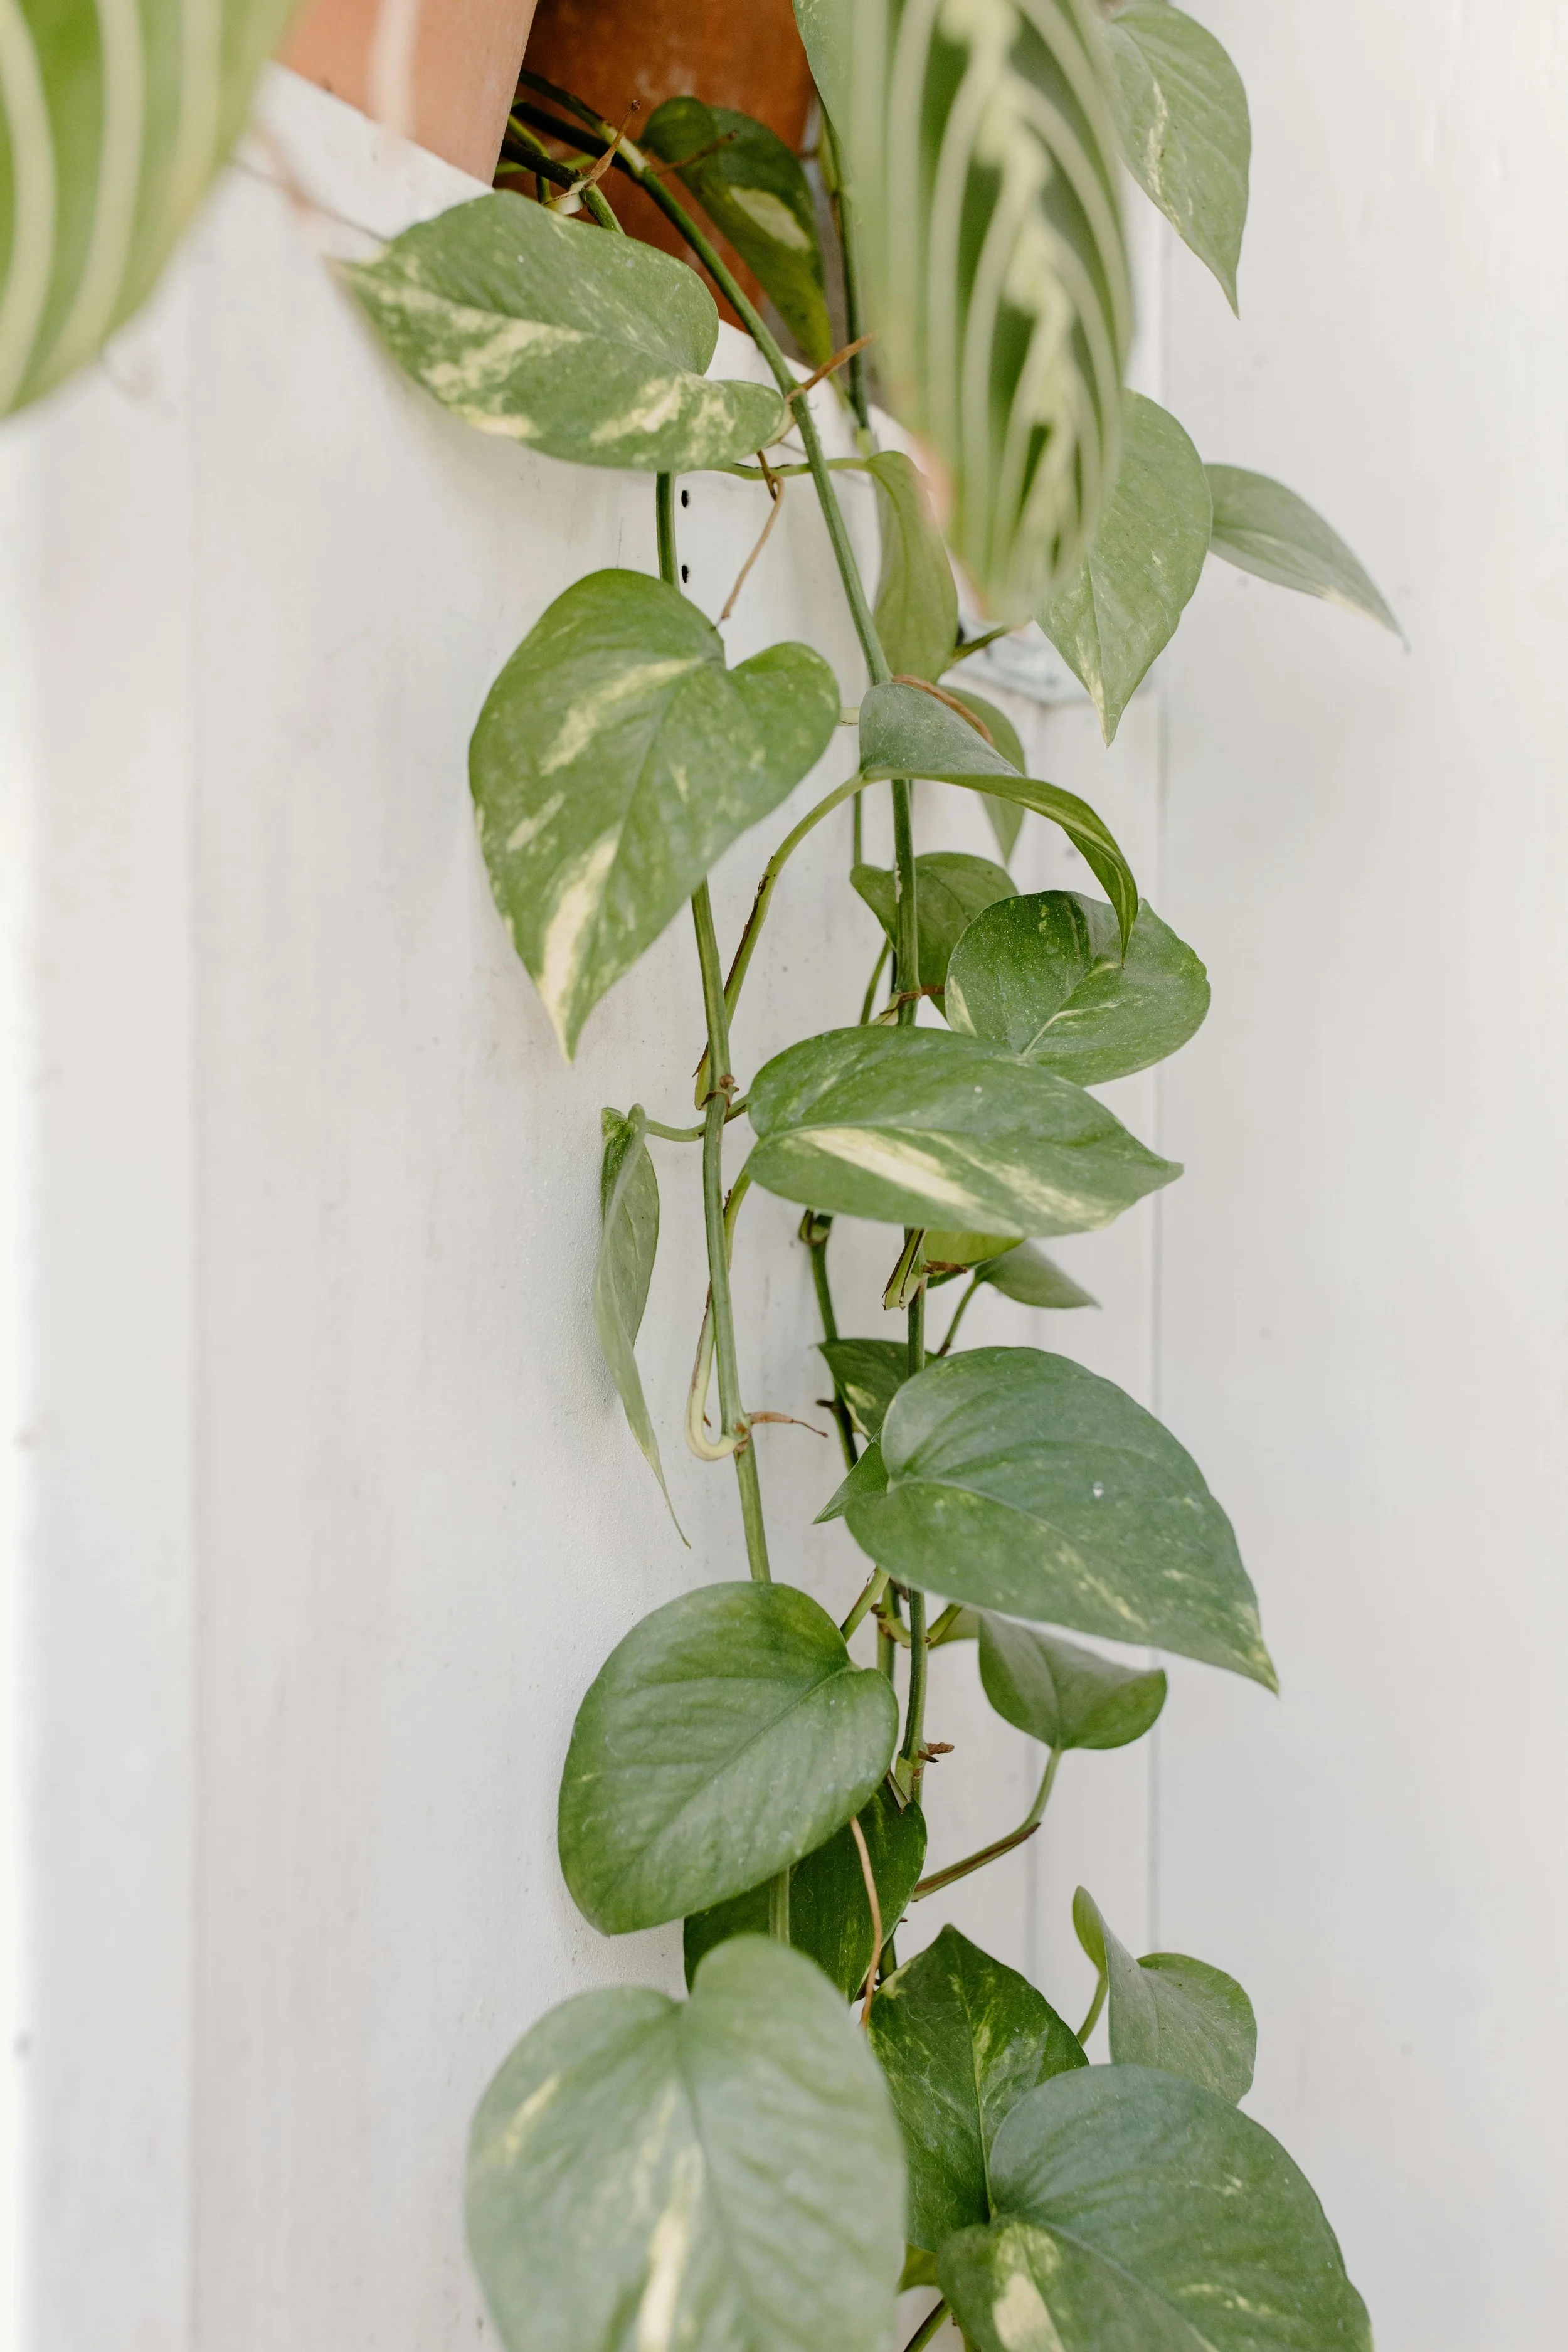
✅ 1. Pothos (Epipremnum aureum)
• What it removes: Formaldehyde, benzene, xylene, carbon monoxide
• Care: Thrives in low to bright light, water weekly
• Bonus: Easy to propagate—cut a vine, root in water, and plant!
• Caution: Toxic to pets if ingested
✅ 2. Snake Plant (Sansevieria)
• What it removes: Benzene, formaldehyde, xylene, toluene, nitrogen oxides
• Care: Very hardy; tolerates low light and infrequent watering
• Bonus: One of the few plants that releases oxygen at night
✅ 3. Spider Plant (Chlorophytum comosum)
• What it removes: Formaldehyde, carbon monoxide, xylene
• Care: Fast-growing and low-maintenance; great for hanging baskets
• Bonus: Non-toxic to pets and produces baby “spiderettes”
✅ 4. Peace Lily (Spathiphyllum)
• What it removes: Formaldehyde, benzene, trichloroethylene
• Care: Likes medium light, consistent moisture
• Bonus: Also reduces mold spores
• Caution: Toxic to pets if ingested
✅ 5. ZZ Plant (Zamioculcas zamiifolia)
• What it removes: Toluene, xylene, and general VOCs
• Care: Extremely drought-tolerant; perfect for low light
• Caution: Toxic if eaten, but safe to touch
✅ 6. Rubber Plant (Ficus elastica)
• What it removes: Formaldehyde and other VOCs
• Care: Bright, indirect light and moderate water
• Bonus: Thick, glossy leaves trap dust
✅ 7. Bamboo Palm (Chamaedorea seifrizii)
• What it removes: Benzene, formaldehyde, trichloroethylene
• Care: Loves bright, indirect light; moderate water
• Bonus: Adds humidity to dry indoor air
🌱 Pro Tips for Using Plants to Detox Your Home
• My plants are in every room. Sometimes, as in my living room, there are multiple plants. One plant per 100 square feet is the NASA guideline for meaningful air purification.
• Keep plants dust-free—wipe leaves gently with a damp cloth
• Rotate plants through different rooms seasonally for light and variety
• Pair with a HEPA filter for a whole-house purification plan
• Be mindful of pets—many plants are fine to touch but toxic if chewed or ingested
→ Safe options include spider plant, prayer plant, calathea, and parlor palm


🌾 Final Words: Detoxing as a Natural Outgrowth of Homesteading
For me, detoxifying my life hasn’t been a separate journey—it’s simply a continuation of the homesteading life I’ve always cherished. Homesteading is about living close to the earth, making things by hand, nourishing our families with intention, and leaving the world a little better than we found it. Choosing clean ingredients, safe tools, and natural materials is just another way I live out those values—one room, one recipe, one habit at a time. It’s not about perfection. It’s about stewardship. About making our homes not just a shelter, but a place of healing, growth, and peace. A place where the air is fresh, the surfaces are safe, and the work of our hands brings life—not harm. And that, I believe, is the heart of true homesteading.
TOXINS IN THE HOME, PART 2: Detoxifying MY Closet
When I began detoxing my home, I started with the obvious culprits—cleaning supplies, skincare, cookware. But as I looked closer, I realized the textiles in my life—our clothes, our sheets, our towels—were a hidden source of chemical exposure. Fabric touches our skin all day long. If I care about what’s in my food, shouldn’t I care just as much about what I wrap around my body?
That shift in thinking led me down the rabbit hole of textile safety—and I haven’t looked back since.
The Hidden Dangers of Synthetic Dyes
I had no idea how many textiles are dyed using chemicals that are outright toxic. One of the first dye groups I learned about—and decided to avoid—was AZO dyes. These are synthetic colorants used to produce bright reds, blacks, yellows, and oranges in everything from clothing to rugs. They’re cheap, colorfast, and unfortunately, very common.
The problem? Many AZO dyes break down into aromatic amines, some of which are known carcinogens. They’ve been banned in the European Union, but they still show up in many products imported from overseas—especially inexpensive, mass-produced clothing and accessories.
And then there’s Methylene Blue.
Methylene Blue: A Neurotoxin in Disguise
This one surprised me. Methylene Blue has legitimate medical uses in tightly controlled doses—it’s used in emergency medicine to treat certain blood disorders and in laboratory staining. But it also shows up as a textile dye, particularly for dark blues and teals.
Here’s where it gets alarming: while it might sound safe because it’s used in medicine, Methylene Blue is a lethal neurotoxin when misused or overexposed. In higher concentrations or through prolonged skin contact, it can cross the blood-brain barrier and interfere with mitochondrial function in brain cells. In other words, it’s a poison to the brain.
It’s never approved for use in consumer textiles—but again, in cheap clothing from foreign sources, oversight is limited. Dyes like this may still be used, especially when the price tag is low and there’s no transparency from the manufacturer.
This is one of the many reasons I now read textile labels like I read ingredient lists.
My Simple Textile Detox Checklist
Want to detox your textile life? Here’s what I follow:
✅ Choose 100% natural fiber fabrics
✅ Look for GOTS or OEKO-TEX® certifications
✅ Avoid synthetic dyes, especially AZO dyes and Methylene Blue
✅ Steer clear of chemical finishes (wrinkle-free, flame-retardant, stain-resistant)
✅ Choose brands that are transparent about their sourcing and dyeing
✅ Support small makers using heritage dyeing methods
✅ Always wash new fabric before wearing or sewing
Let me know if you’d like this checklist as a printable—I’d be happy to share a version you can keep in your sewing room or fabric stash.
Why This Matters to Me
Detoxing isn’t just about what we eat or clean with—it’s about the whole environment we live in. Our skin is porous. Our children are sensitive. And in my home, if it touches our bodies, it needs to be clean, breathable, and safe.
That’s why I no longer buy cheap clothes made from mystery fabrics. That’s why I say no to AZO dyes and avoid anything dyed with Methylene Blue. And that’s why I keep seeking out better materials and sharing what I learn. This journey is about creating a home that supports health, simplicity, and integrity—right down to the threads.
Want to detox your fabric stash too?
Visit TrueWoven to explore my collection of 100% cotton, ethically sourced, toxin-free dyed fabrics. Or message me for your free printable Safe Textile Checklist—so you can shop smarter and sew safer.


What I Choose InsteaD
I’ve switched to using and selling only textiles that I trust—ones that are clean, breathable, and dyed with care.
Here’s what I look for:
✅ Natural fibers like cotton, linen, hemp, and wool
✅ GOTS or OEKO-TEX® certified fabrics
✅ Undyed or naturally dyed using plant-based sources like indigo, madder root, and marigold
✅ No flame-retardant, stain-resistant, or wrinkle-free finishes
✅ Brands that are transparent about how their fabrics are made and dyed
Choosing safe textiles feels like a return to common sense—and to the kind of handmade, heritage quality our grandmothers would’ve expected as the norm.
Homemade Soap for a Natural, Non-Toxic Lifestyle
A Simple Joy for a Natural Life
There’s something incredibly grounding about making soap at home. In a culture where everything is fast, packaged, and artificial, creating something as essential as soap—with your own hands and carefully chosen ingredients—feels like a gentle rebellion. Homemade soap supports a natural, non-toxic lifestyle, invites creativity, and even offers a meaningful educational moment for your homeschool chemistry lessons.
And perhaps best of all, it reconnects us to the old ways—where we can slow down, make something with care, and delight in the journey.
Why Homemade Soap Matters in a Non-Toxic Lifestyle
Control every ingredient
C
Three Main Methods of Soap Making
If you’re new to soap making, the choices can feel overwhelming. But once you understand the three main methods, it all starts to make sense. Each has its strengths and challenges—and each one fits different goals.
1. Cold-Process Soap
This traditional method involves combining oils with a lye solution and letting the soap cure for 4–6 weeks. It’s ideal for those who want full control over ingredients and love experimenting with textures, swirls, and natural colorants.
2. Hot-Process Soap
Similar to cold-process, but the mixture is heated (usually in a slow cooker) to speed up saponification. The finished soap is “ready to use” much sooner, though many still prefer a short cure time for best texture. Hot-process tends to have a more rustic, earthy look.
3. Melt and Pour
This is the easiest and safest method for beginners or for crafting with kids. You start with a pre-made soap base (which can be homemade—recipe below!). You melt it, add your fragrance or herbs, pour it into molds, and let it set. No lye handling needed.
Understanding Lye: Friend, Not Foe
Let’s talk about the elephant in the soap room: lye.
Lye, or sodium hydroxide (NaOH), is an essential part of the soap-making process. It reacts with fats and oils in a process called saponification, turning them into actual soap. There’s no way around it—if there’s no lye, there’s no soap.
But here's the important part: once the reaction is complete and the soap has cured, there is no lye left in the final product. The process neutralizes the caustic base, leaving behind a gentle, cleansing bar.
Respect lye. It’s strong and can cause burns if handled carelessly. But with gloves, goggles, and ventilation, it’s perfectly manageable. People have been safely using lye for hundreds of years—it just requires mindfulness.
Essential Oils vs. Fragrance Oils
If you want to scent your soaps (and most of us do), you have two options: essential oils or fragrance oils.
Essential Oils are plant-based and natural. They offer aromatherapy benefits and align with a non-toxic lifestyle. However, they’re more delicate, often require higher usage rates, and can fade over time. Choose organic when possible.
Fragrance Oils are synthetic blends created in labs. Some are skin-safe and phthalate-free, but many contain undisclosed ingredients. If you’re trying to avoid toxins, stick with pure essential oils.
Common Ingredients for Homemade Soap (Always Choose Organic if Possible)
Base oils:
Olive oil (gentle and conditioning)
Coconut oil (cleansing and bubbly)
Castor oil (boosts lather)
Sweet almond or jojoba oil (luxurious and moisturizing)
Tallow (adds hardness, creaminess, and a traditional feel—render your own or choose pasture-raised)
Butters:
Shea butter
Cocoa butter
Mango butter
Liquids:
Distilled water
Goat milk, cow milk, oat milk
Herbal teas
Add-ins:
Dried lavender, rose petals, chamomile
Oatmeal, ground almonds, or coffee (exfoliants)
Clays (kaolin, rose, French green)
Natural colorants: turmeric, cocoa powder, beetroot powder, spirulina, activated charcoal
Two Recipes: Milk Soap for Every Method
Recipe 1: Homemade Milk Soap Base (for Melt and Pour)
Make this ahead to create your own non-toxic melt-and-pour base
Ingredients:
16 oz coconut oil
16 oz olive oil
6 oz castor oil
4.7 oz lye (sodium hydroxide)
12 oz frozen goat milk or cow milk (do not use fresh—it must be frozen or ice cold)
Instructions:
Prepare molds and line with parchment if needed.
In a well-ventilated area, slowly add lye to the frozen milk. Stir gently until dissolved. It may discolor—that’s normal.
Melt oils in a stainless steel pot. Let cool to about 100°F.
Once both lye mixture and oils are around 90–100°F, pour the lye into the oils.
Stick blend until you reach light trace.
Pour into molds and cover.
After 24–48 hours, unmold and cut. Allow to cure for 4–6 weeks.
Once fully cured, cut into chunks and re-melt to make future melt-and-pour bars.
Recipe 2: Cold-Process Milk and Honey Soap
Ingredients:
16 oz olive oil
10 oz coconut oil
4 oz shea butter
2 oz castor oil
4.5 oz lye
10 oz frozen goat milk
1 tbsp raw honey (mixed into a bit of oil or warm water)
1 tsp kaolin clay (optional for silky texture)
20–30 drops lavender essential oil (or blend of choice)
Instructions:
Freeze milk in cubes and prepare your mold.
Add lye gradually to frozen milk, stirring constantly. Place in an ice bath if needed to avoid overheating.
Melt oils and butters together. Cool to 90–100°F.
Blend lye mixture into oils and mix with a stick blender until light trace.
Add clay, honey, and essential oils.
Pour into mold, tap down, and insulate lightly.
Unmold after 24–36 hours. Cure 4–6 weeks.
Final Thoughts: Soap Making as a Lifestyle Choice
Soap making isn’t just about clean hands or a cleaner home. It’s about intention. It’s a commitment to using what’s wholesome, letting your hands make instead of machines, and embracing the kind of slowness that fills your soul.
It’s about passing down knowledge—teaching our children how chemistry and care come together in a bar of soap. It’s about the joy of saying, “I made this,” and knowing it’s good.
If you’re new to soap making, start simple. Be safe. Be creative. And let it become part of the rhythm of your natural, non-toxic lifestyle.
Want to Try Your Hand at It?
If you’re ready to dive in, I’ve created a downloadable checklist and recipe card set to help you gather your supplies, track your cure dates, and jot down creative ideas for your next batch.


Soap is one of those everyday products that most folks don’t think twice about. But conventional store-bought soaps (which are often technically detergents, not true soap) can be full of synthetic additives—fragrance oils, preservatives, stabilizers, and coloring agents. Many of these ingredients are known skin irritants or endocrine disruptors. Others are simply unnecessary.
Homemade soap allows you to:
Control every ingredient
Choose organic, sustainable oils and additives
Avoid synthetic fragrances and dyes
Create nourishing bars for sensitive skin
Reduce packaging waste
It’s a simple act with big impact, especially when you're trying to detoxify your home and live in closer harmony with nature.
Creativity in Soap Making
Soap making is science, but it’s also art.
You can:
Design with colors using natural clays, herbs, or powders
Add textures with dried flower petals, oatmeal, or coffee grounds
Create layers or swirls for beautiful visual effects
Choose nourishing ingredients like shea butter, cocoa butter, goat milk, or honey
Every bar can be a little masterpiece—and a deeply personal gift. Children especially love designing their own “signature bar,” choosing scents and colors while learning about chemistry and natural ingredients.
