
Homestead Soap in a Small Space
What It Really Is (and Why Lye Isn’t the Villain)
Homemade soap has had a quiet resurgence—not as a hobby-craft curiosity, but as a practical, small-space homestead skill. When storage is limited and every item needs to earn its keep, soapmaking stands out: it turns simple ingredients into something essential, long-lasting, and deeply customizable. But before we get to benefits, we need to answer the foundational question.
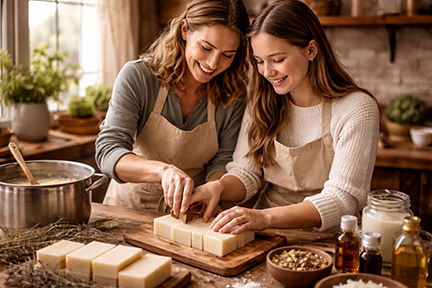
Handing down the skill of soap making is a family affair
What actually makes something “soap”?
Soap is not just “something that cleans.” True soap is the result of a specific chemical reaction called saponification. When fats or oils are combined with an alkali (traditionally lye) and water, the alkali breaks the fats apart and recombines them into two things: soap molecules and glycerin. No reaction, no soap.
This matters because many products marketed as “soap” aren’t soap at all. They’re detergents—synthetic surfactants designed to mimic soap’s cleaning action. They work, but they’re chemically different and behave differently on skin.
But isn’t lye dangerous?
Yes—and also no. Lye (sodium hydroxide for bar soap, potassium hydroxide for liquid soap) is caustic in its raw form. So is bleach. So is vinegar, in the opposite direction. Chemistry always demands respect.
Here’s the key point: properly made soap contains no free lye.
During saponification, the lye is consumed by the oils. When the recipe is correctly formulated and fully cured, the lye is gone. It has done its job and no longer exists as lye. What remains is soap and glycerin.
This is why soap must cure. In cold-process soap, the bars rest for several weeks to allow the reaction to complete and excess water to evaporate. By the end of curing, a properly made bar is chemically stable and safe to use.
If soap burned skin, humanity wouldn’t have survived the last several thousand years.
Why homemade soap is different from store-bought bars
Most commercial “soap” bars are detergent bars. They clean aggressively, strip oils, and then add synthetic moisturizers back in to compensate. Homemade soap takes a different approach: it cleans while retaining naturally produced glycerin, which attracts moisture to the skin.
Homemade soap is typically:
Less drying
Free of synthetic detergents
Free of artificial fragrances (unless you choose otherwise)
Made with whole oils rather than petroleum derivatives
That glycerin? Large manufacturers remove it to sell separately. Homemade soap keeps it.
Is homemade soap actually better?
“Better” depends on what you value.
If you want uniformity, long shelf life under fluorescent lights, and identical bars year after year, commercial products win.
If you want transparency, control, and adaptability—especially in a small home—homemade soap shines.
You choose the oils. You choose the scent level (or none). You choose whether it’s gentle enough for hands washed dozens of times a day or scrubby enough for garden dirt.
And importantly: soap bars are space-efficient. One curing rack replaces shelves of plastic bottles.
Can ingredients be homegrown?
Yes—partially, and meaningfully so.
While most of us won’t be pressing olive oil indoors, many soapmakers incorporate:
Herbal infusions (calendula, chamomile, lavender)
Homegrown botanicals for color and mild exfoliation
Rendered animal fats (tallow or lard), which make excellent, hard, long-lasting bars
Even in apartments, windowsill herbs can become functional ingredients. Soap is forgiving and scalable.
Why soapmaking fits small-space homesteading

Soapmaking doesn’t require acreage or a workshop. It requires:
small, dedicated workspace (often a kitchen counter)
A handful of tools used only for soap
Time, not constant attention
Bars store neatly. They travel well. They replace multiple products. And they connect daily hygiene to intentional living—a core principle of homesteading, regardless of square footage.
Homemade soap isn’t about nostalgia or aesthetics. It’s chemistry, stewardship, and practicality wrapped into one solid bar.
And once you understand what soap actually is, the fear disappears—and the usefulness becomes obvious.
Cold Process vs. Melt-and-Pour: An Honest Comparison
Not all homemade soap is made the same way, and that’s okay. Two methods dominate small-scale soapmaking: cold process and melt-and-pour. Both have a place, especially in small homes.
Cold process soap is made from scratch. Oils, water, and lye are combined and undergo full saponification in your workspace. This method gives you complete control over ingredients, superfat levels, and additives. It also requires curing time and careful handling during the initial stages.
Melt-and-pour soap starts with a pre-made soap base that has already been saponified. You melt it, customize it, and let it harden. It’s faster and requires no lye handling, but you’re limited by the base’s formulation.
The difference is not moral; it’s chemical and practical.
Cold process:
Full ingredient control
Naturally retained glycerin
Longer cure, longer-lasting bars
Requires handling lye safely
Melt-and-pour:
Faster, simpler workflow
No raw lye handling
Less customization at the foundational level
Often contains added solvents for meltability
For small-space homesteaders, the choice often comes down to priorities: control versus convenience, process versus immediacy.
Safety in Small Spaces: Soapmaking Without Drama
Soapmaking does not require fear, but it does require order.
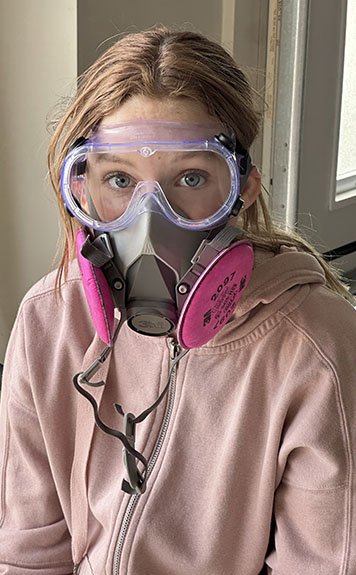
My granddaughter Remy’s first experience in soap making when she was still afraid of the lye.
In a small home, safety is mostly about boundaries. Use dedicated tools. Work when pets and children are not underfoot. Measure carefully. Respect the chemistry.
Lye safety in particular is straightforward:
Always add lye to water, never water to lye
Use gloves and eye protection during mixing
Work in a well-ventilated area
Clean up immediately and thoroughly
Once the soap batter is poured and begins to set, the risk drops sharply. After curing, the bars are inert. No fumes. No residue. No lingering danger.
Soapmaking is not an ongoing hazard—it’s a brief, contained process.
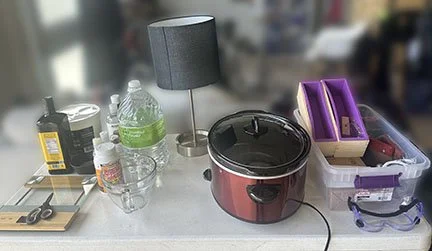
This was our set up for soap making in the garage. All the cooking was done in a crockpot, and I still do it that way in my kitchen.
Storage, Curing, and Living Small
One of soap’s quiet advantages is how little space it ultimately requires.
Curing soap doesn’t mean clutter. A single shelf, tray, or rack with airflow is enough. Bars can be stacked once cured and stored in breathable containers. Compared to liquid soaps, shampoos, and cleaners, bar soap consolidates dramatically.
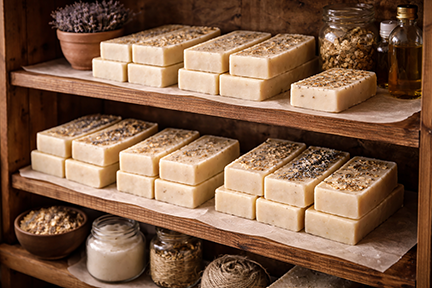
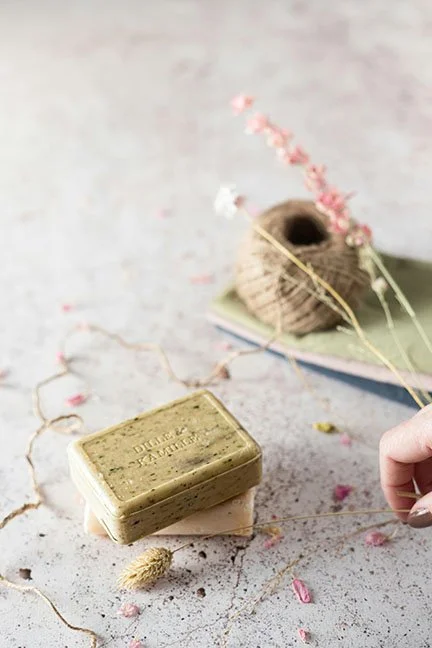
Handmade soap curing on shelves.
In very small homes, this matters.
Soap replaces:
Hand soap
Body wash
Often dish or household cleaners
Fewer bottles. Less plastic. More function per square inch.
A Simple Beginner Recipe (Free Download)
Rather than crowd this post with measurements and formulas, I’ve created a very small-space beginner soap recipe as a free download.
It’s designed for:
Minimal equipment
Easily sourced oils
Clear safety guidance
Scalable batch size
Apartment- and small-kitchen friendly workflow
The recipe walks through the process step by step, with plain explanations of what’s happening and why—so you’re not just following instructions, you’re understanding the craft.
Why This Matters
Homesteading in a small space isn’t about pretending you live on acreage. It’s about choosing skills that compress well—skills that turn a small investment of time and space into long-term usefulness.
Soapmaking is one of those skills.
It’s chemistry you can trust, storage you can manage, and daily utility that earns its place in a very small home.
