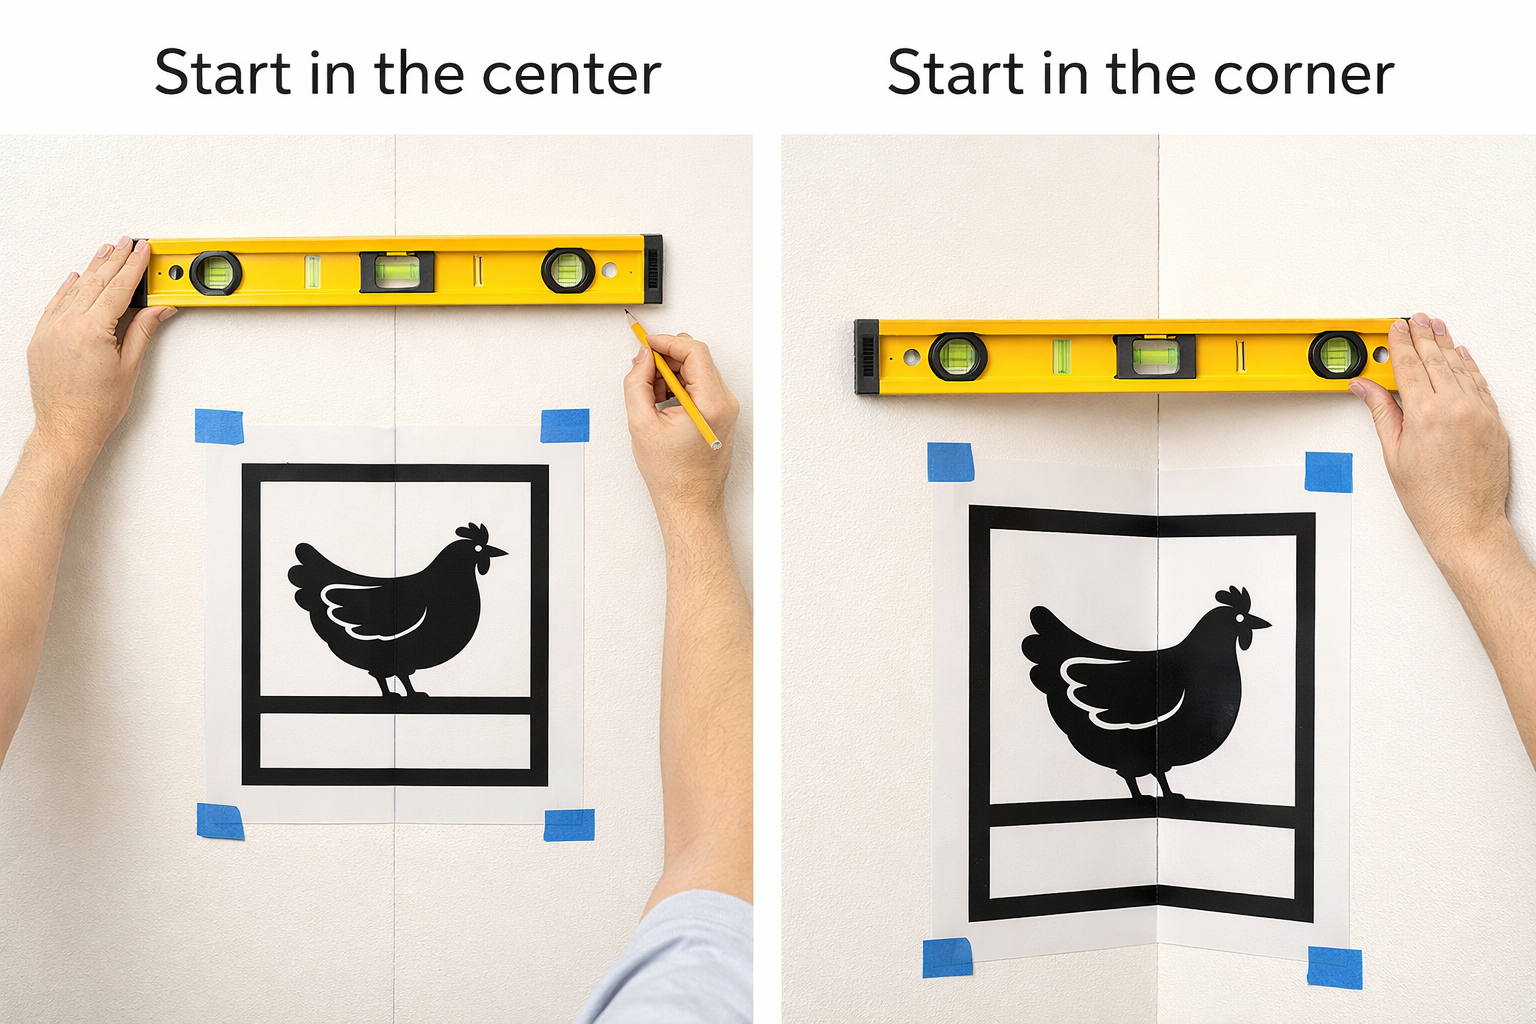
Secure the Stencil
Tape the stencil in place with painter’s tape. Some people also use a light mist of repositionable spray adhesive on the back of the stencil to reduce slipping and paint bleed. If you do, use only a light amount.
Check alignment each time before painting. Do not assume it is right just because it was right last round.
If your stencil has registration marks or built-in overlap guides, use them. They are there to keep the repeat pattern consistent.
Apply Paint Lightly
This is the heart of the whole project.
Dip your stencil brush, foam roller, or pouncer lightly into paint. Then remove excess paint on a rag or paper towel. The applicator should feel almost dry.
Apply the paint with a light up-and-down pouncing motion or a gentle rolling motion. Do not scrub sideways. Sideways motion pushes paint under the stencil edges.
Build color slowly. Two light passes are better than one heavy one.
Pay extra attention around delicate details. Fine stems, bee wings, herb leaves, and lettering all need a light hand.
When you lift the stencil, do it carefully. Pull straight away from the wall rather than dragging it sideways.
Repeat the Pattern Across the Wall
Move the stencil and line it up with the previous section. Tape it in place again. Check your registration points. Repeat.
Work slowly. The rhythm gets easier after a few rounds.
A few practical tips:
step back often to check the overall look
wipe the back of the stencil now and then if paint builds up
clean the stencil front too if details begin to blur
do not rush the top or bottom rows just because you are tired of the project
Music helps. So does tea. Rage does not.
Handle Edges, Corners, and Tight Spots
This is where projects stop being pretty on Instagram and start being real life.
You usually have three options near trim, ceilings, corners, and outlets:
skip the full motif and let the pattern fade naturally at the edge
bend or flex the stencil gently into place
use only part of the stencil and fill in what fits
For many homestead-style rooms, an imperfect edge is not a tragedy. In fact, a too-perfect wall can feel oddly out of character in an old-fashioned space.
If needed, use a small artist’s brush to hand-finish tiny bits near trim or corners. Nobody standing in the room with a cup of coffee is going to inspect your wheat sprig with a magnifying glass.
Fix Small Mistakes as You Go
Bleed happens. Slight misalignment happens. Human beings remain human.
If paint bleeds under the stencil, let it dry fully, then touch it up with your base wall color using a small brush.
If one section looks too faint, let it dry and stencil it again lightly rather than dumping more wet paint on immediately.
If a repeat is slightly off, do not panic unless it is glaringly obvious. Tiny inconsistencies often disappear once the whole wall is finished.
This is a handmade finish. Handmade is allowed to look handmade.
Let It Dry and Decide Whether to Seal
Most stenciled walls do not need a protective topcoat, especially in low-traffic areas. In higher-touch places like children’s rooms, mudrooms, or some kitchens, a protective finish may help, but test first to make sure it does not smear the design or change the sheen in a strange way.
Usually, if you used good wall paint and let everything cure properly, you can leave it alone.
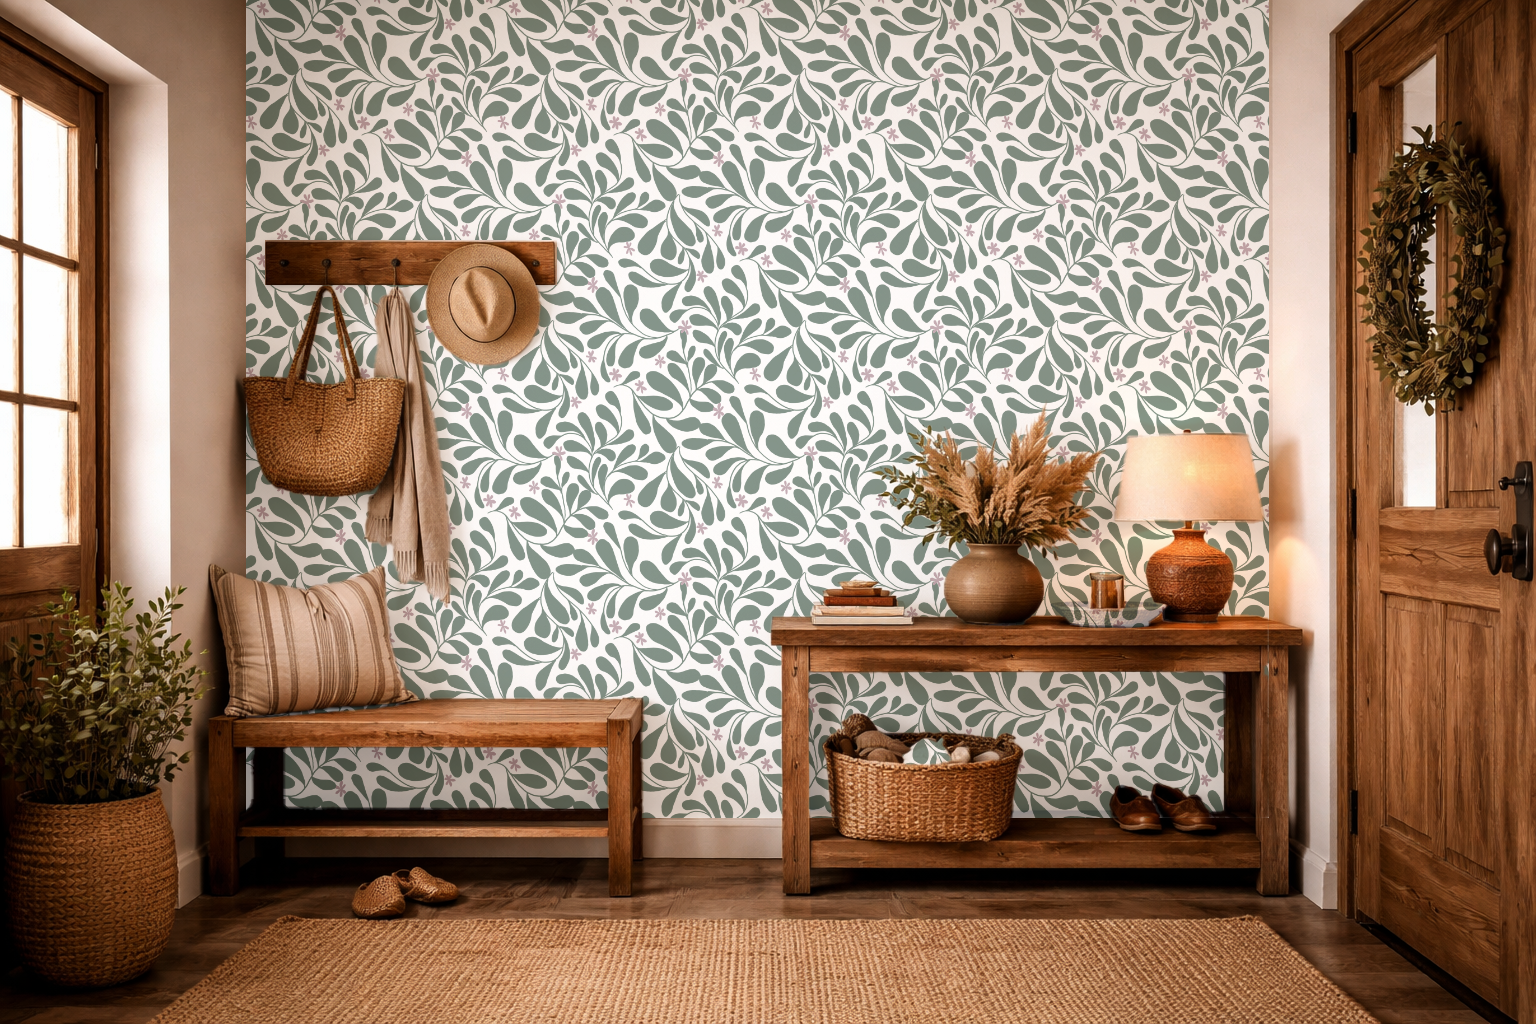
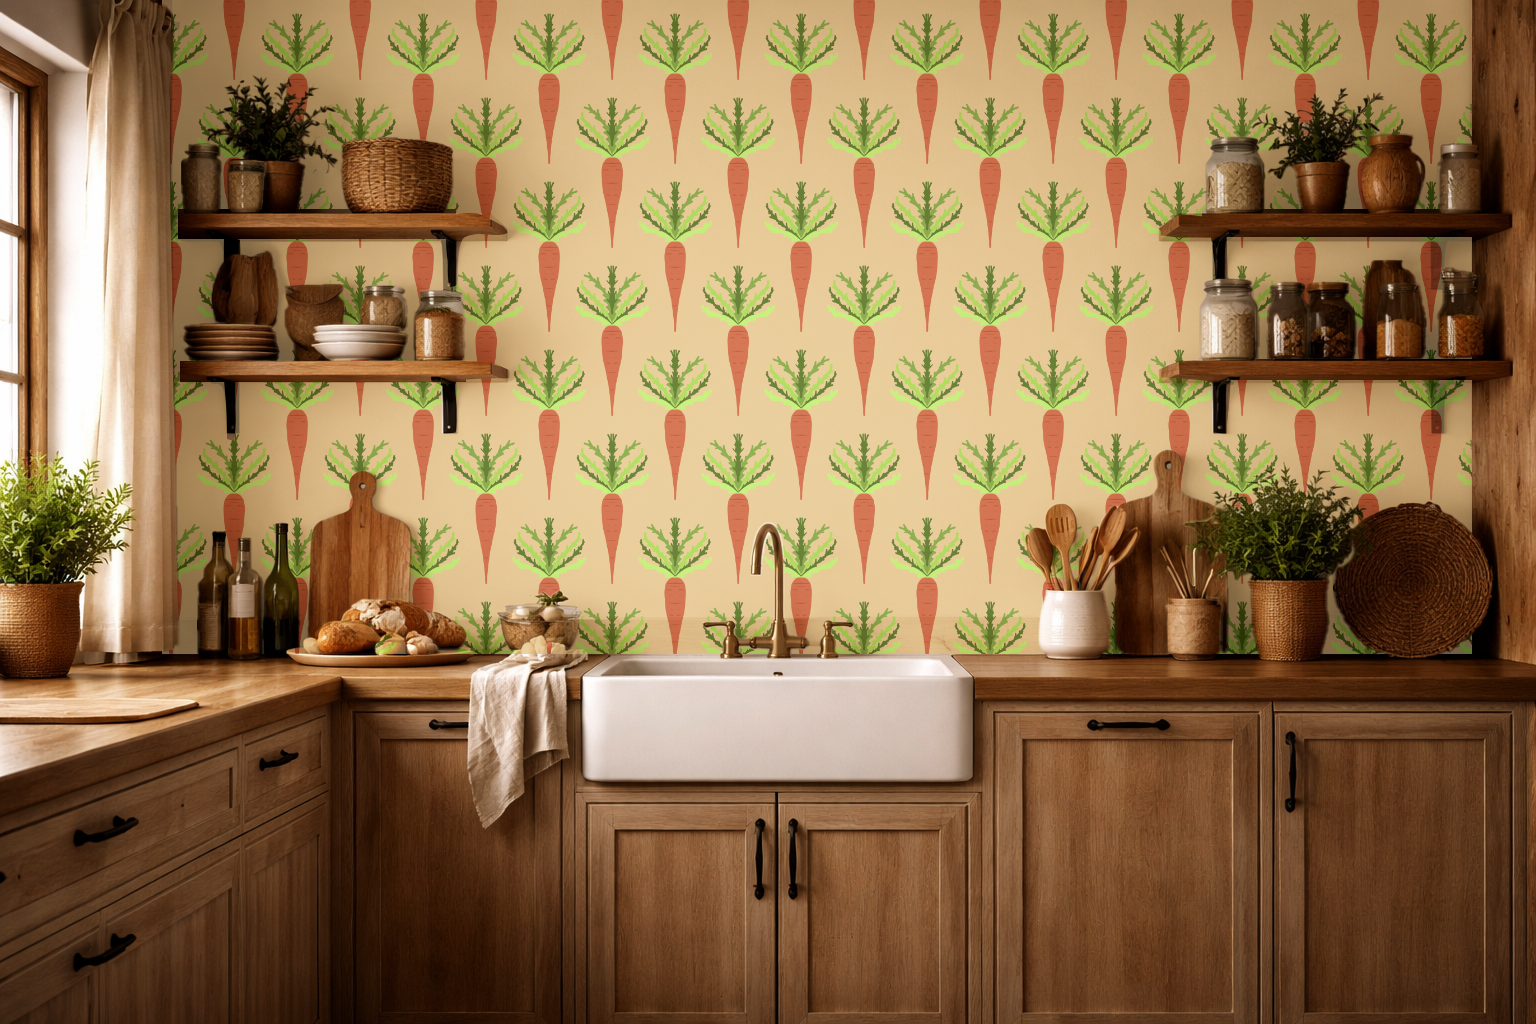
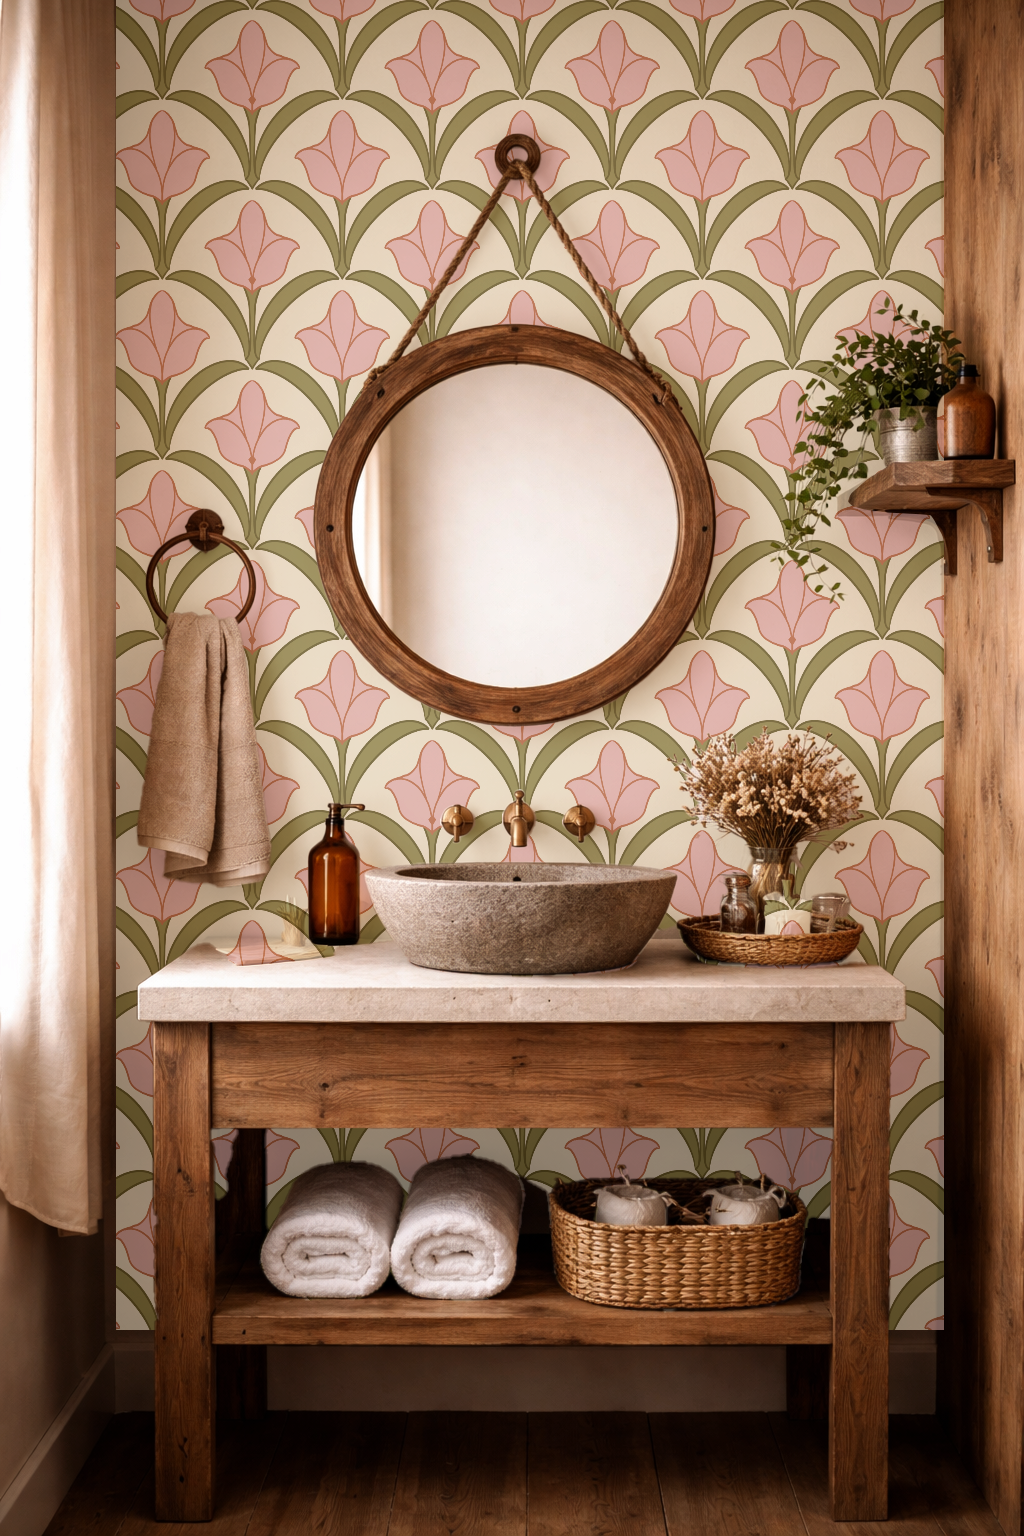
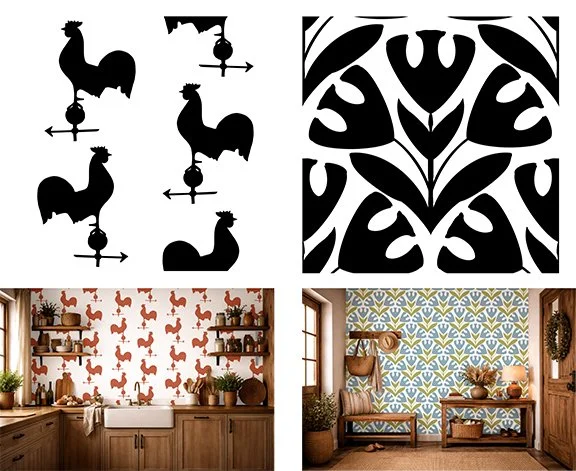
Best Homestead-Inspired Stencil Ideas for Different Rooms
If you want the wall to fit the room naturally, pair the motif to the use of the space.
For a pantry:
herbs
grain stalks
tiny pears or apples
seed packet labels
bees
For a mudroom:
simple stars
boots and branches
laurel motifs
small repeating leaves
For a laundry room:
lavender
line-dried linens motif
simple vines
farmhouse stripe effect with stencil repeats
For a kitchen nook:
wheat
wildflowers
roosters
olive branches
small trailing berry vines
For a bedroom:
soft botanical repeat
quilt-inspired geometry
scattered stars
delicate branches
What Color Combinations Work Best
Homestead style usually looks best in quiet, useful colors rather than loud contrast.
Some reliable combinations:
warm white wall with soft sage stencil
cream wall with faded blue stencil
greige wall with warm ivory stencil
dusty blue wall with off-white stencil
muted olive wall with lighter sage stencil
soft tan wall with barn red used very sparingly
buttery cream wall with brownish charcoal motif
Low contrast gives a gentler, old-house look. High contrast makes the stencil feel bolder and more graphic. Neither is wrong, but low contrast is often easier to live with long term.
Is Stenciling Better Than Wallpaper?
For some homes, yes.
Stencil can be better when:
your walls are imperfect
your budget is limited
you want a handmade look
you only want pattern in one area
you like being able to customize paint colors
you do not want to wrestle wallpaper into corners and around trim
Wallpaper can be faster on very large, smooth walls if you know what you are doing. But stencil is flexible, affordable, and easier to make feel personal.
Final Thoughts
A stenciled wall can add a surprising amount of warmth to a room. It does not need to be elaborate. A quiet repeat in the right color can make a pantry feel tended, a laundry room feel cheerful, or a breakfast nook feel like a place where people actually linger.
Choose a simple homestead-inspired pattern. Use less paint than you think you need. Start straight. Work slowly. Touch up what needs touching up. Then stop before you overwork it.
That is true of many things in a home, actually.
And I have a gift for you! Here are two homestead stencils you can use to stencil your own walls. If you have a Cricut, Silhouette, or other cutter, I have provided them as SVG files, too (they say “studio3 but should open in any cutter).